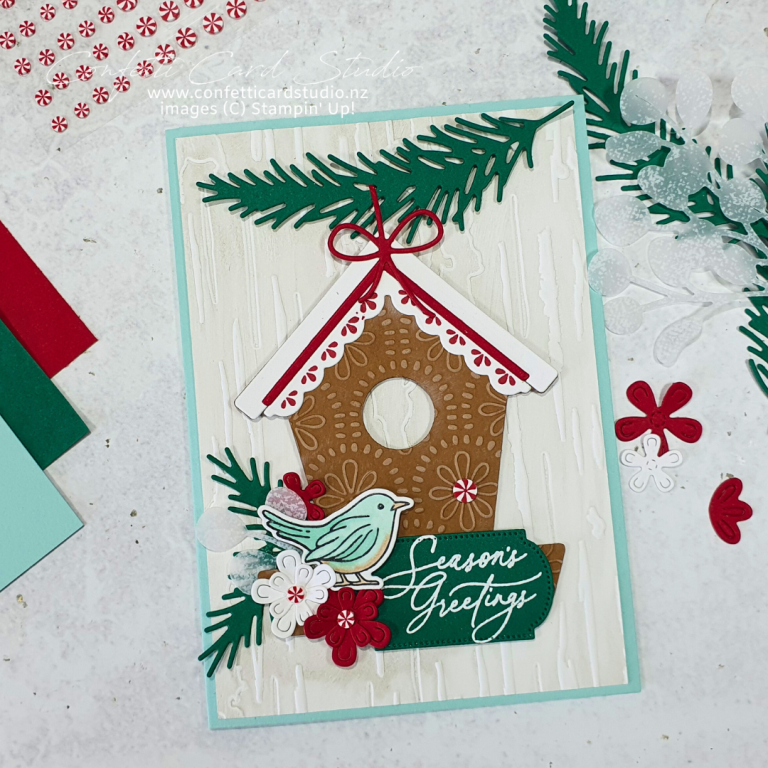
A Holly Jolly Branches Christmas Card with a Handmade Stencil
My Holly Jolly Branches Christmas Card was a project I created for a team event. I cased the original design by Jay Soriano from the UK, then added a few of my own touches to make it my own.
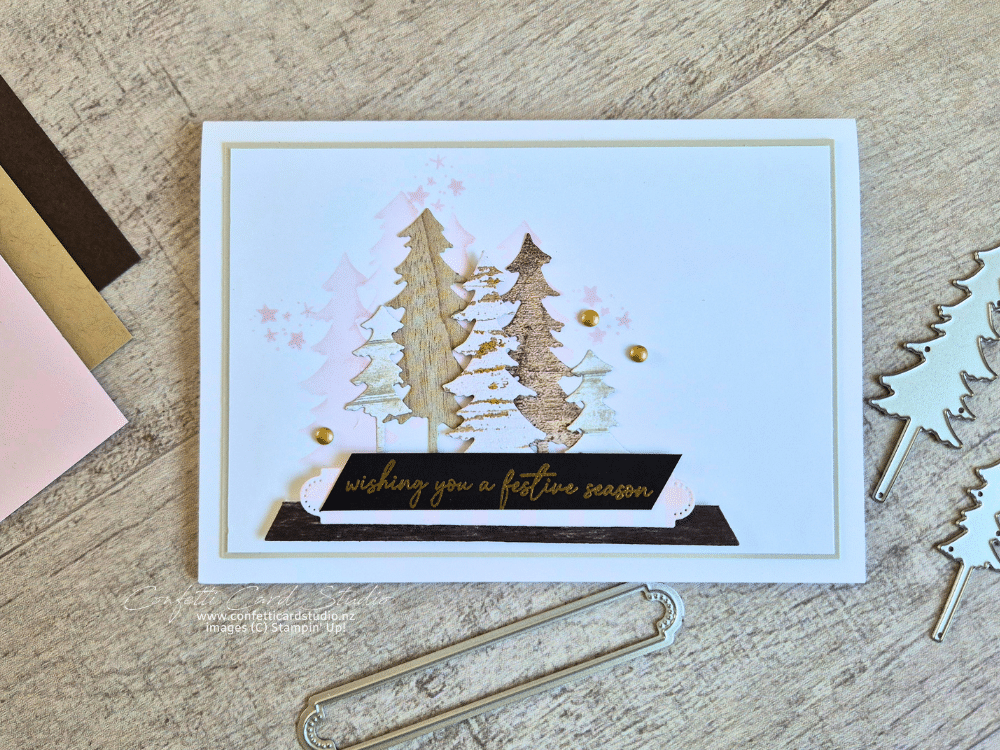
I particularly love the soft pink background and the combination of rustic woodgrain Christmas trees. However, the feature I want to share with you is the handmade stencil. It’s such a simple way to add a soft, layered background to your cards without overwhelming the main design.
Creating a Reusable Christmas Tree Stencil
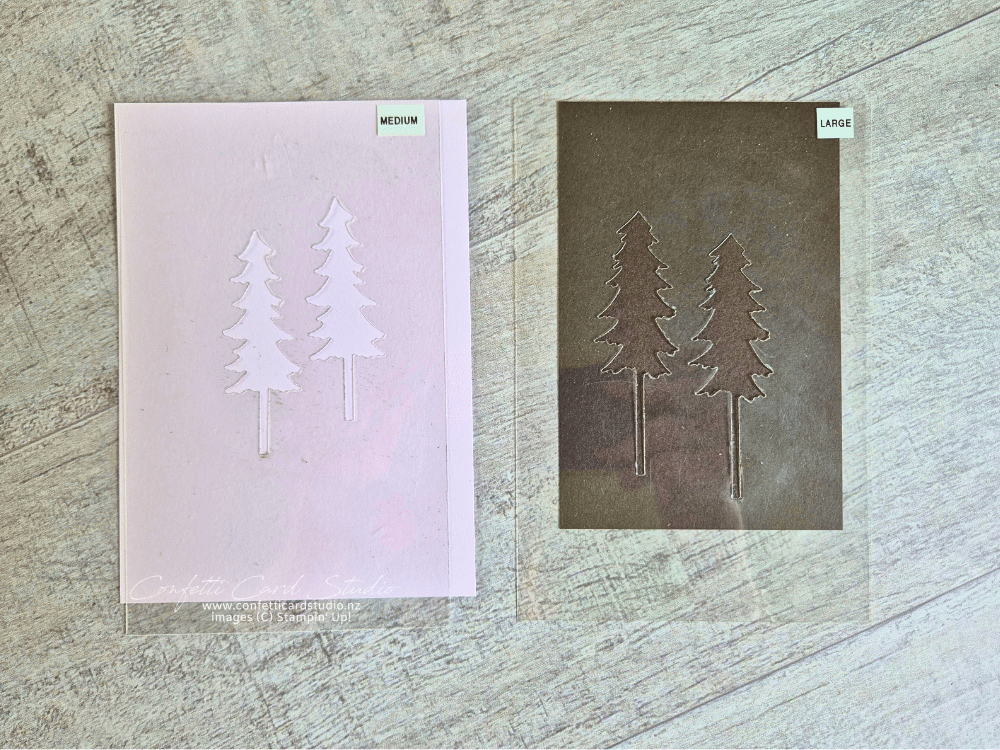
One of my favourite parts of this project was making my own stencils using Window Sheets.
I die-cut two of the larger trees and two of the medium-sized trees from Window Sheet. This gave me a selection of tree shapes to work with when creating the background.
The best part is that these stencils are reusable! Once you’ve finished your project, simply tuck them into your die storage case or your usual craft storage system. Then, they’ll be ready for your next project.
You could use this same idea with so many different dies. Think flowers, leaves, stars or even little Christmas decorations. It’s a great way to get more use from your dies.
Adding Soft Colour with a Stencilled Background
For the background, I used Barely Blush ink and a blending brush to sponge colour through my handmade stencil.
I started with a light application of ink and gradually built up the colour. This gave me a lovely soft effect that sits beautifully behind the die-cut trees.
Here’s a little tip! I found it helpful to lift one side of the stencil as I worked. This allowed me to check the depth of colour and see how the pattern was developing. You can then add more ink where needed without making the background too dark.
Once I was happy with the trees, I stamped the little stars from the Holly Jolly Branches stamp set around them. This filled in some of the open spaces and added another layer of interest to the background.
The result is a soft, almost painted look. In fact, someone commented on my video that the card looked like a painting! I thought that was such a lovely observation.
Layering Patterned Trees with Country Woods DSP
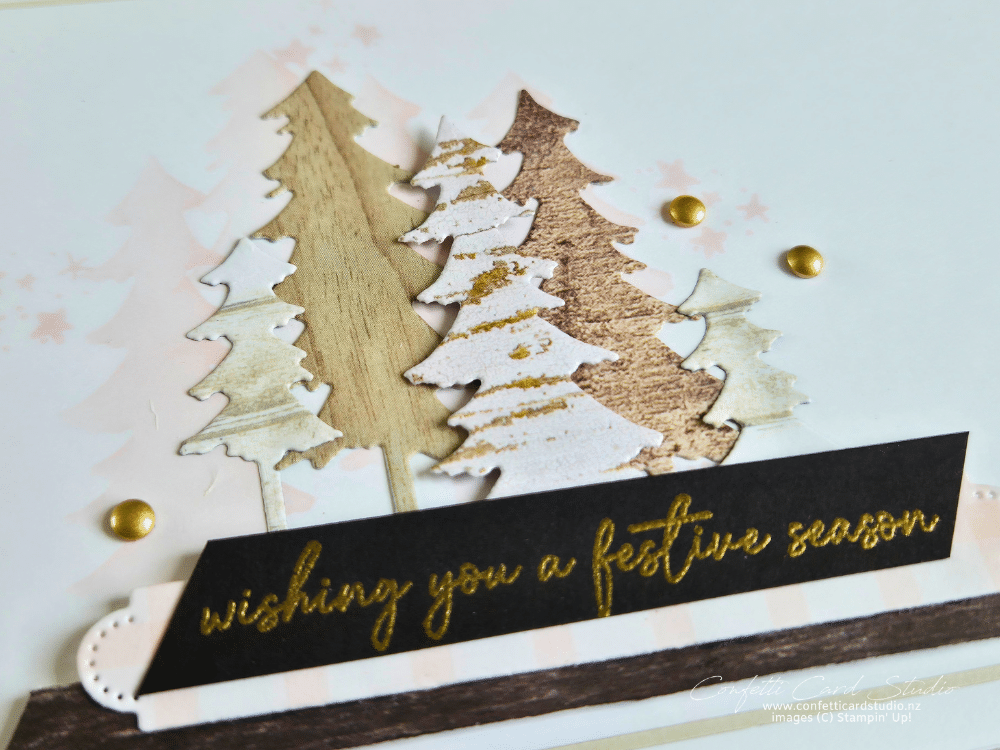
For the focal point, I die-cut my Christmas trees from Country Woods Designer Series Paper.
This paper pack has so many beautiful woodgrain patterns and colours. It was fun choosing different patterns to create some variation between the trees. My selections are also a little different from Jay’s original design.
I love how the woodgrain adds texture and a rustic feel. Each tree has its own personality, yet the patterns work beautifully together.
Creating the Sentiment with Gingham DSP
I made a few changes to the sentiment area, too.
For the layered pieces, I chose another pattern from Country Woods Designer Series Paper and paired it with the 2026–2028 In Color Gingham Gallery DSP in Barely Blush.
I die-cut the gingham piece using the label die from the Holly Jolly Branches Bundle. Isn’t it such a cute little label?
Finally for the sentiment, I chose one with a beautiful font. I trimmed it down so it wouldn’t dominate the trees or compete with the gingham label. This kept the sentiment area neat and allowed the Christmas tree arrangement to remain the main feature.
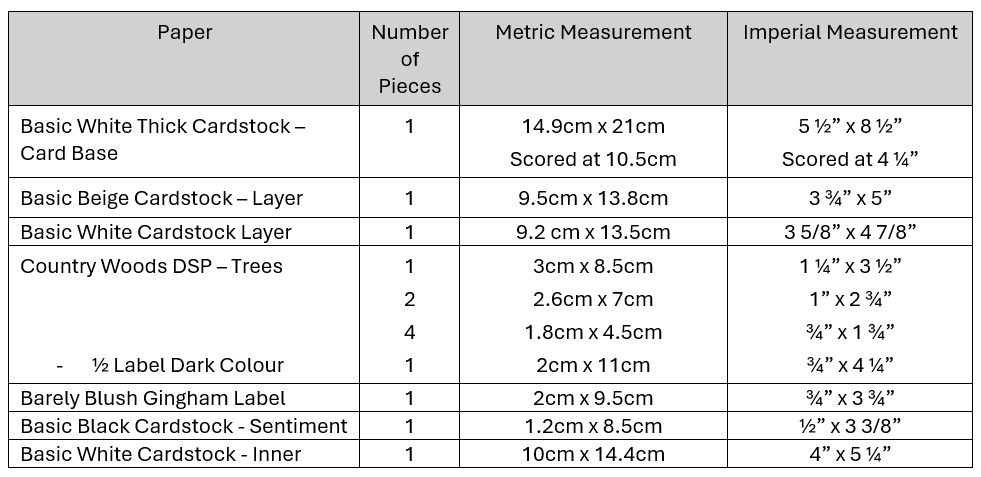
You Can Make It Measurements
Watch The Holly Jolly Branches Christmas Card Video
Adding the Finishing Touches
To finish my Holly Jolly Branches Christmas Card, I added a few of the gorgeous Gold Adhesive-Backed Dots.
I love having a whole pack of gold embellishments to reach for! They add just the right amount of shine and bring a little festive sparkle to the finished card.
I also carried the design through to the inside. I repeated the stencilled trees, star stamping and die-cut trees to tie everything together. It’s a lovely way to make the inside of the card feel just as special as the front.
Click here for a complete supply list for printing, shopping, or saving. When you’re ready to order, I’d love to help you and be your Stampin’ Up! Demonstrator.
Here are some other projects where I’ve made my own stencils: