If you love soft gradients and elegant backgrounds, you’re going to enjoy today’s project! In this post, I’m sharing a step-by-step ombre ink blending technique that adds a beautiful, dreamy touch to any handmade card.
Featuring the Thankful Garden stamp set, this design is perfect for showcasing soft florals and thoughtful sentiments.

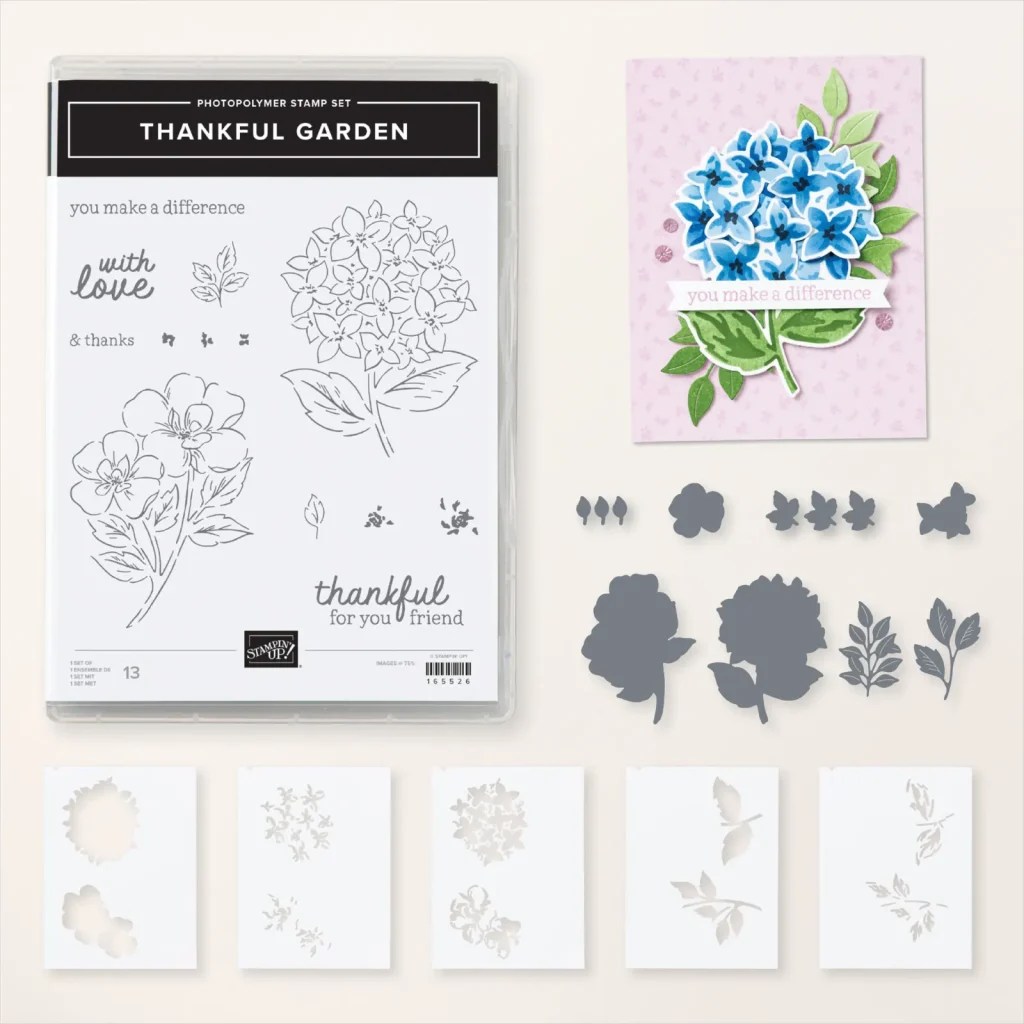
THANKFUL GARDEN BUNDLE
The Thankful Garden Bundle is an online exclusive, and it’s a beauty! This set features delicate line-art floral images, perfect for your favourite colouring technique. You can mix and match the images with any sentiment, making it a super versatile bundle.
Even better, it includes stamps, dies, and masks that work together. You can layer the florals and create gorgeous multi-dimensional designs in any colour you choose.
MY STEP-BY-STEP OMBRE INK BLENDING TIPS
For this project, I used step-by-step ombre ink blending to create a soft, dreamy background. Here are the tips I follow every time:
Load your blending brush well. Press it into the ink pad in a circular motion
Always tap off onto scrap paper before touching your cardstock
Start at the lightest area and blend toward the darkest
Use circular motions on your cardstock to avoid streaks
Keep reinking your brush to build up colour, especially in darker areas
Apply pressure! The soft bristles need a bit of push for bold results
You can use a sponge dauber instead. But the smaller surface means more intense colour, which can be harder to control. If you’re using a dauber, try starting in the darkest area and blending out. And always tap off excess ink first—unless you want a big circle surprise!

OMBRE INK BLENDING DESIGN DETAILS
This card design is CASEd from Emma Goddard in the UK (July 2024). I loved her layout and adapted it using:
The Thankful Garden stamp set
Exposed Brick 3D embossing folder
Lost Lagoon ink
Black-and-white striped paper from the Lovely Garden 12” x 12” DSP
My sentiment says “Happy M♡m Day” (retired), but on my Fresh Freesia version, I used “Happy Birthday” from Simply Said.
At first glance, the card looks clean and simple. But look closer—you’ll notice the texture, layering, and subtle details that make it special. And best of all? You can change up the colours to suit any occasion.
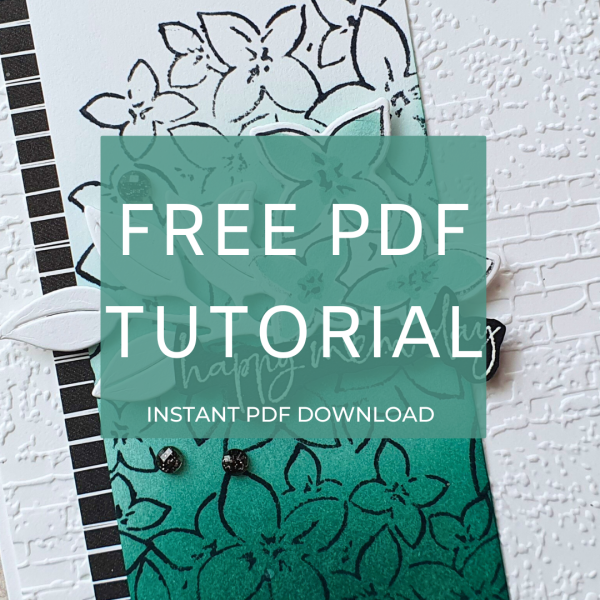
FREE TUTORIAL
Each week after my Facebook Live the free tutorial is emailed to interested subscribers on my email list. If that’s you please subscribe and receive these free ideas directly to your inbox each week.
Click here for a complete supply list for printing, shopping, or saving.
More ink blending ideas can be found in these previous posts –
Cheerful Daisies Retiform Technique in Boho Blue
Emboss Resist Technique with Reindeer Fun
Ready to give it a go? Grab your blending brush, ink pads, and the Thankful Garden bundle, and start blending your own ombre magic today!
💬 I’d love to know—what colour will you choose for your ombre background? Leave a comment below and share your favourite ink combinations. Let’s inspire each other!
And if you found this tutorial helpful, don’t forget to share it, pin it, or subscribe for more cardmaking inspiration. Happy crafting!