There’s nothing quite like the texture and detail you can achieve with an embossing folder, and the new Traditional Wreath 3D Embossing Folder is a showstopper. Today I want to share a project where I combined this folder with a simple inking technique that turns your background into something really special. I’m calling traditional wreath embossing ink magic.
Traditional Wreath Embossing Ink Magic Technique
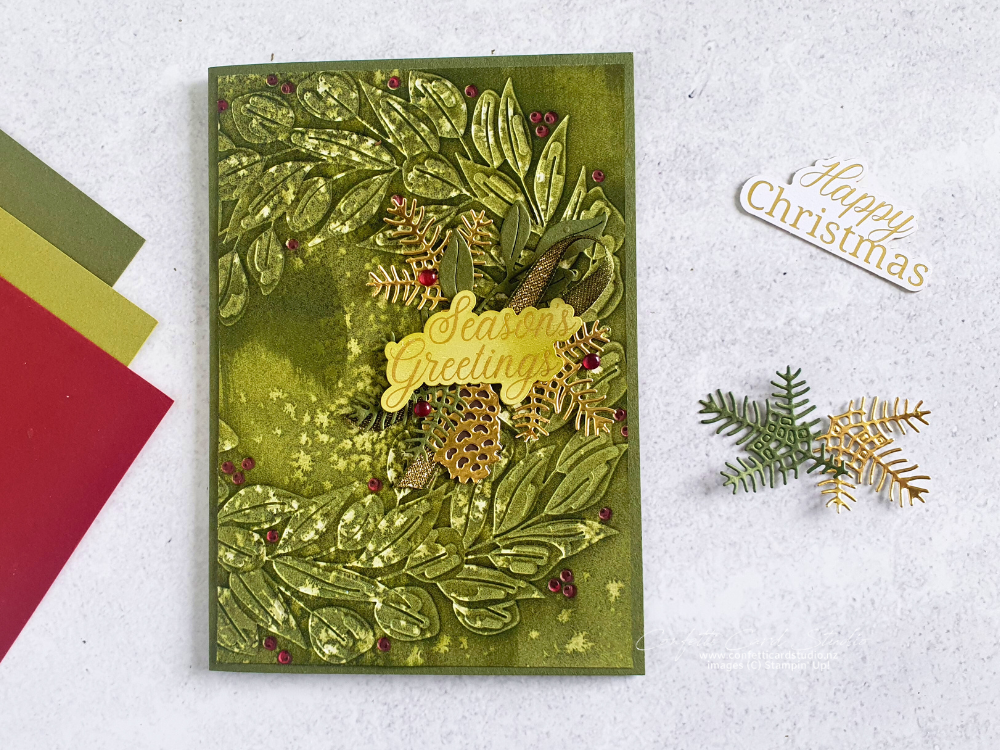
If you’ve been following along, you might remember a previous post where I added ink to the debossed side of some designer series paper. The results were beautiful and added instant depth and definition. I’ve used the same idea here with the Traditional Wreath Embossing Folder, and I think it works perfectly to highlight all that gorgeous wreath detail.
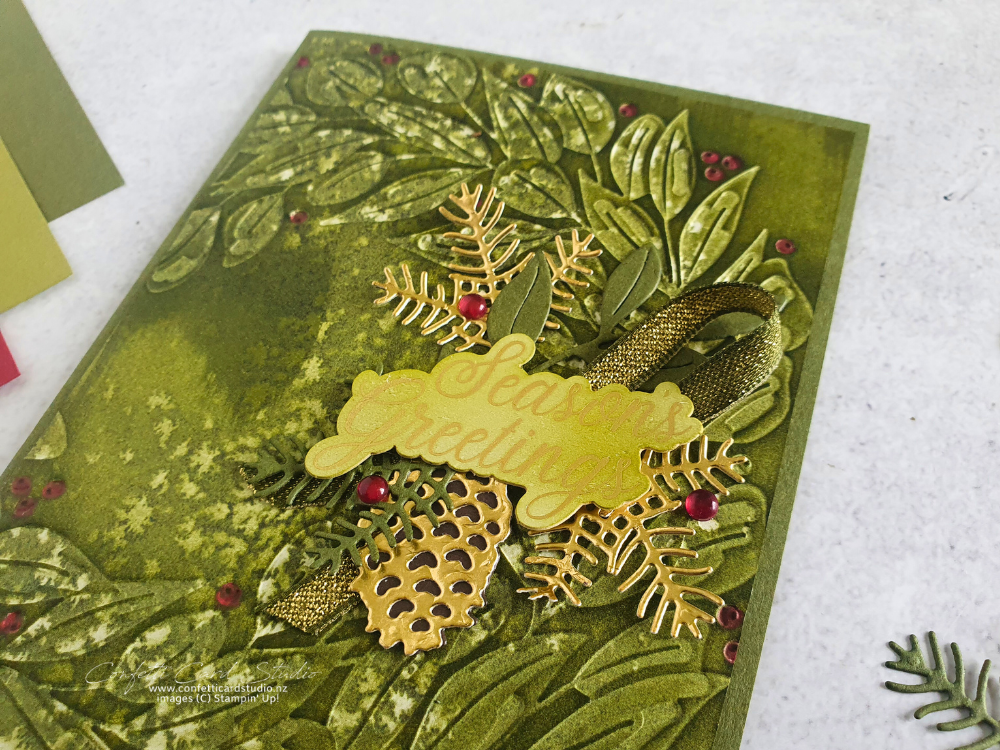
This time, I took it a step further by colouring the embossed berries with my Cherry Cobbler Stampin’ Blend. That tiny pop of colour makes the wreath come to life and adds a festive touch.
Creating the Focal Point
To balance out the background, I added a focal piece using the Delicate Pines Dies. These dies layer beautifully over the embossed wreath, and the intricate detail works so well with the 3D texture.
For the sentiment, I chose one from the Greetings For You Mix & Match Ephemera Pack. Instead of leaving it plain, I showed how you can customise your sentiments by gently brushing Old Olive ink over the piece with a blending brush. It’s such a quick and easy way to tie your greeting into the rest of your project.
Why You’ll Love This Ink Magic
The best part about this technique is how versatile it is. By combining the Traditional Wreath Embossing Folder with a little ink and colour, you can create:
Festive Christmas cards with rich detail
Elegant all-occasion wreath cards by changing the colours
Unique textures that make every design look polished and professional
It’s truly embossing ink magic—turning simple cardstock or designer paper into something that looks like you’ve spent hours crafting.
Watch the Traditional Wreath Embossing Ink Magic Tutorial
You can watch my step-by-step video below to see exactly how to create this card. It’s easier than it looks, and the end result is a stunning handmade card that’s sure to impress.
Try the Traditional Wreath Embossing Folder
Would you like the full written tutorial, complete with measurements for all the layers? This tutorial was already sent to my email subscribers, but I don’t want you to miss out! If you subscribe to my mailing list by 30 September, I’ll send this tutorial as a special welcome gift.
If you’re looking for a way to elevate your holiday cards this season, the Traditional Wreath Embossing Folder is a must-have. Add in your favourite ink colours, a few dies or ephemera pieces, and you’ll have a card that looks both classic and handmade with love.
Have you tried adding ink directly to your embossing folders yet? Give it a go—you might just find it becomes your new favourite embossing trick!
Click here for a complete supply list for printing, shopping, or saving. When you’re ready to order, I’d love to help you and be your Stampin’ Up! Demonstrator.