Recently, I hosted a swap with my crafting community and shared a Fold Out Panorama Card using Thoughtful Journey DSP. (You can see that post here.) Today, I’m excited to share the dimensions for this card along with a new version featuring the beautiful Nests of Winter DSP.
The Nests of Winter DSP has a whimsical, hand-sketched design of birds perched on trees, paired with detailed nature elements. The colour palette includes soft tones like Gray Granite and Crumb Cake, with vibrant pops of Coastal Cabana, Shaded Spruce, Garden Green, and Cherry Cobbler. It’s perfect for creating a charming scene.

Cutting the Paper for the Fold Out Panorama Card
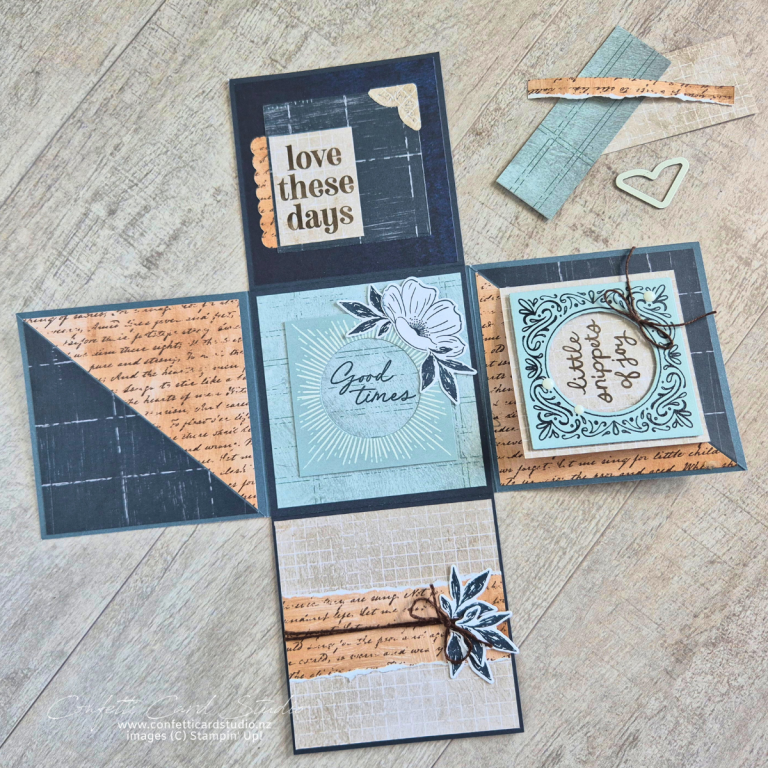
To design this card, I used a specific page from the Nests of Winter DSP that features birds flitting around branches at the top and bottom. I cut the DSP to fit the overall size of the card and then carefully trimmed it into two parts. This allowed me to keep the design continuous across the fold, making the scene feel seamless. I love how these details remain hidden until the card is opened, offering a beautiful surprise inside.

Panorama Card Revealed
Here’s a look at the full reveal! Cutting the paper this way creates a beautiful, panoramic scene inside the card. It’s a simple fold with just one scoreline on the card front. Adding one extra panel, then attaching the two scene pieces inside, completes the look.
Simply download the tutorial below and I’ll provide the measurements and walk you through the construction.

Die Cut Birds Straight from the DSP
There are two sheets of this paper that feature different birds you can easily die cut. The best part? The coloring is already done for you, so creating a polished design is a breeze!
Masking the Stamp
In the video, I also demonstrate how to mask off specific words you don’t want to appear on a stamp. This is a fantastic trick to keep in your crafty arsenal, giving you even more flexibility with your stamps.

Thanks so much for stopping by Confetti Card Studio today! Join me for a class in person! ~ Vanessa