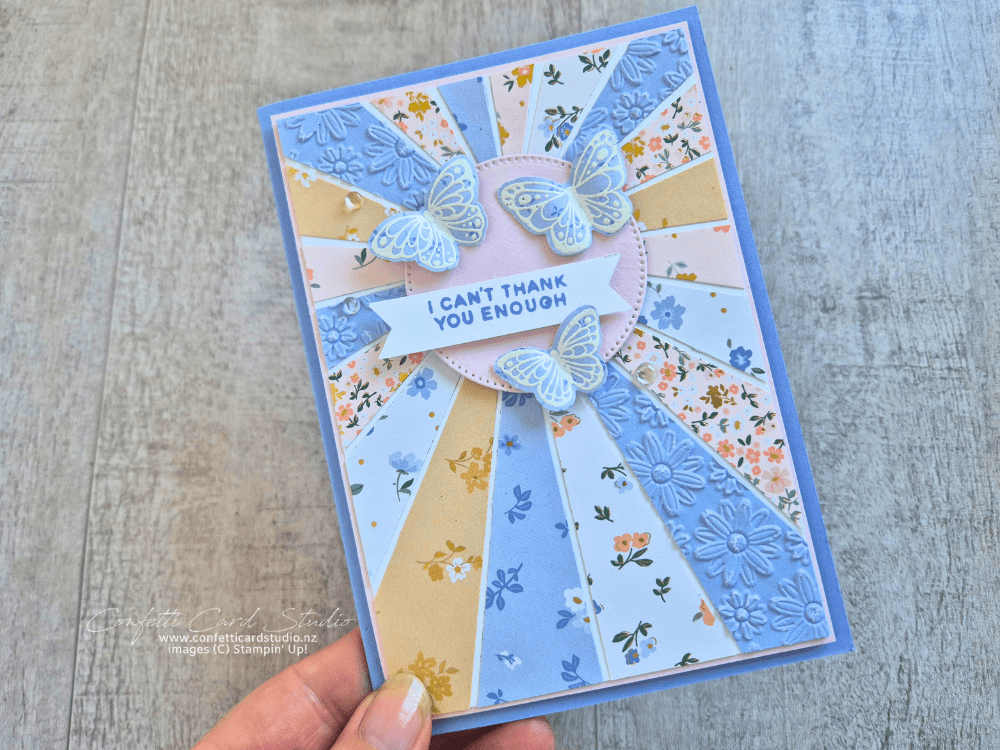
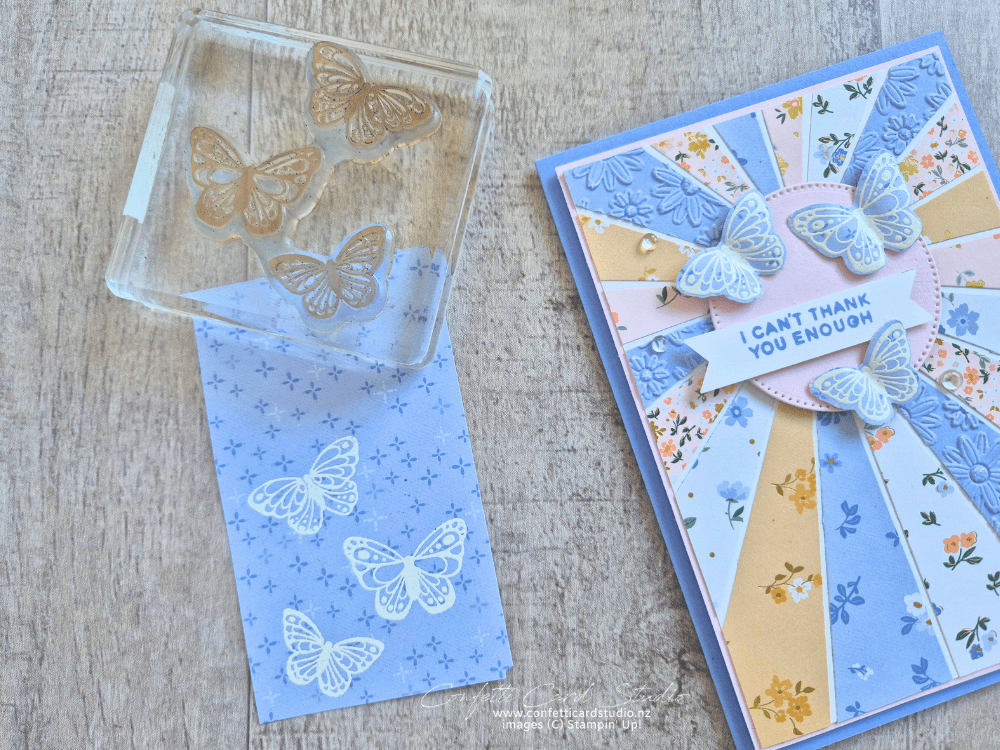
This week I’m sharing how to create a sunburst background using Designer Series Paper. I chose the Bloom Boutique Designer Series Paper because the small floral patterns work beautifully for this striking technique. The idea for this sunburst background was inspired by a project created by Jacque Williams.
Unfortunately, the microphone wasn’t turned on at the beginning of my live video. As soon as I realised, I gave a quick recap of everything I’d already explained. For the YouTube version, I’ve edited the video to begin from the point where the microphone was switched on.
Create a Sunburst Background with Bloom Boutique Designer Series Paper
Along with the Bloom Boutique Designer Series Paper, I used Hydrangea Hue Two-Tone Cardstock embossed with the Lazy Daisy 3D Embossing Folder. I love the slightly weathered effect this embossing folder creates on the Two-Tone Cardstock. It adds texture without taking attention away from the sunburst background.
How to Size Your Sunburst Background
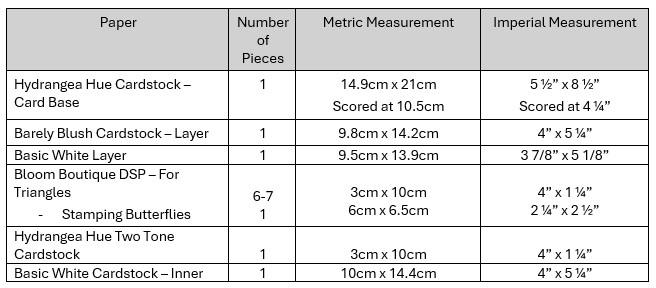
The position of your focal point determines the length of the Designer Series Paper triangles. For my card, each triangle was approximately 10 cm (4 inches) long. In the video, I adjusted the position of the focal point so it worked with the length of the triangles.
To achieve a neat and balanced sunburst background, it’s important that every triangle is cut to the same width before assembling the design.
Decorating with Stamped Butterflies
For the focal point, I white heat embossed the All Aflutter butterflies onto another pattern from the Bloom Boutique Designer Series Paper. I love how the white embossing allows the beautiful patterned paper to show through the stamped images. The coordinating punch made cutting out the butterflies quick and effortless.
The Barely Blush circle was cut using the Stylish Shapes Dies, which continue to be one of my most-used die sets. I finished the card with a sentiment from the Banner Sayings Bundle. Having both the greetings and coordinating punch makes creating perfectly shaped banners so easy.
More Sunburst Background Ideas to Try
One of the things I love most about this sunburst background technique is how versatile it is.
On this card, I left a small white gap between each piece of Designer Series Paper to help define the rays. However, you could place each piece edge to edge for a completely different look.
You can also experiment with the position of the focal point. Instead of placing it in the centre, try moving it to one side or even towards a corner for a more dramatic design. Another fun option is to use coloured cardstock instead of white as the base layer to completely change the finished look.
You Can Make It Measurements
Watch the Sunburst Background Using DSP Card Tutorial Video
Final Thoughts
I hope this project inspires you to give a sunburst background a try with your favourite Designer Series Paper. It’s a simple technique that creates a striking result, and it’s easy to customise to suit any paper collection, colour palette, or occasion.
Click here for a complete supply list for printing, shopping, or saving. When you’re ready to order, I’d love to help you and be your Stampin’ Up! Demonstrator.
This design has been added to my sketch book, visit this post to find out more about using a sketch book in your cardmaking.